
WordPress 3 now includes the features that were previously available as WordPress MU. “MU” stands for Multi-User (or Multi-Site) and this lets you to run multiple blogs all from a single WordPress installation. This walk-through will help you configure WordPress to manage multiple sites, each with their own second-level domain (SLD).
As you go through this walk-through, it helps to understand that WordPress MU was originally designed to create a branded, automated community of blogs using sub-domains (i.e. third-level domains) such as user1.wordpress.com, user2.wordpress.com, etc.
You can sign up on wordpress.com right now and get your own instant blog, hosted on their servers. You become a part of the wordpress.com community. WordPress MU was designed to allow you to create your own communities under your own domain name branding.
This walk-through addresses a slightly different type of user which is perhaps a server admin or simply a person who runs several blogs. There is no “community” and you don’t allow anonymous users to stop by and create a blog.
You might currently have WordPress installations on multiple servers with totally unrelated domains. Keeping the code and plugins updated for multiple blogs gets to be a hassle, so the idea of a single, centralized WordPress install is appealing for maintenance reasons. Thanks to WordPress’s flexible architecture you can do this, but it’s not part of the original design.
The reason I write all of this is to hopefully explain why SLDs are outside the scope of WordPress’s original design. You can still set it up without understanding any of this, however it will make things easier if you know how the pieces fit together.
Table of Contents
Quick Note
To keep this simple I’m only going to write about the multi-site configuration. I’m assuming you know how to install WordPress, edit config files on your server, create a MySQL database on your host and map sub-domains.
These things may be done differently depending on your host so you will need to do the research for your own host server. If you run your own server you may have to know how to configure it for multiple domains as well.
DNS Configuration
Again, I’m not going to get into DNS configuration. However, I will say that a simple setup is to simply point all of your domains to the same IP address and let WordPress do the rest.
You can also assign one domain an IP and then park each additional domain onto this one, which may save hosting fees. WordPress relies on the hostname, so it doesn’t matter how you’ve configured Apache or IP addresses, so long as the domain maps to the physical location of your WordPress install.
As a handy tip – you can edit your local hosts file to point a domain to the IP of your WordPress installation and WordPress will install easily this way.
This is a great way to experiment and migrate over an existing site without taking the domain name offline. If you don’t understand what this means, then don’t worry about it!
Step 1 : Install WordPress
Install using all defaults is fine. You should install this onto the domain that you plan to use as your “master” domain. My recommendation is to install it at the top level of your domain, for example “domain.com” (without the “www” prefix). If you plan to use sub-domains for different sites then this will keep things simple.
You can always add “www” during site configuration, but you can’t remove it from your sub-domain sites if it was installed that way. For example your sites will look like this: site1.www.domain.com instead of simply site1.domain.com.
Verify that WordPress is running but don’t bother putting any content in at this point. In the next few steps we’re going to enable new menu items one after the next that are necessary to use the multi-site feature.
Step 2 : Enable the WordPress Multi-Site Feature
Assuming WordPress is running, edit wp-config.php and add the following line:
define('WP_ALLOW_MULTISITE', true);

After you add this line and save the file, return to the WordPress Admin page and look for a new menu item Tools->Network. (If on 3.1 then instead you will see a new link next to the Logout link called “Network Admin” and from there go to Settings -> Network Setup) Navigate to this new menu and you’ll be prompted to “Create a Network” in order to enable the multi-site feature.
You have some choices as to whether you want to use sub-domains or sub-folders for your network. Leave all the defaults and choose sub-domains. We’re going to be using separate SLDs anyway so choosing sub-domains seems to make more sense to me. If you choose folders, you’ll be on your own from this point forward.

Once you enable the network, you will be given configuration text that you must copy and paste into an .htaccess file and some additional variables to be pasted into wp-config.php. Do this as directed on the Network page.
In WordPress 3.0 – after you edit these files and re-login you should see another new menu “Super Admin” which is above the dashboard menu. Your site is now ready for multiple sites.
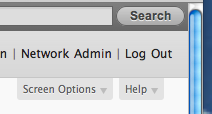 In WordPress 3.1 The Super Admin menu has been replaced with a separate “Network Admin” screen which you use instead of the “Super Admin” menu. The link to this is located in the upper-right part of the screen next to the “Log Out” link. This link will let you toggle in/out of network admin mode.
Now, you no longer need to install multiple copies of WordPress because you can run multiple blogs from one installation. By default, you would only be allowed to run other blogs as a subdomain. To use other domains for blogs, you can use a Domain Mapping plugin.
Step 3 : Install Plugin WordPress MU Domain Mapping
At this point your server is already setup to handle multiple sites, but we need to install a plugin in order to support SLDs. The plugin to use is called “wordpress-mu-domain-mapping“ This plugin also includes a special file known as a “drop-in” which must be manually copied and hooks into the lower levels of the WordPress API.
 You can install this plugin by manually uploading it, or through “Plugins->Add New.” Just make sure
you install version .052 or higher. After you have installed it, go ahead and activate the plugin. You’ll notice that plugins now have an option to “Network Activate” which activates a plugin for all sites.
Once the plugin is installed, you need to manually install the Sunrise “drop-in” which is included with the plugin source files.
You may either copy sunrise.php from /wp-content/plugins/wordpress-mu-domain-mapping/ to /wp-content/ or if you prefer you can create a symbolic link (for example ln -s plugins/wordpress-mu-domain-mapping/sunrise.php. I prefer the link myself).
Once you’ve copied or linked the file, you have to edit wp-config.php one last time and add the following line which will tell WordPress to activate the drop-in:
define( 'SUNRISE', 'on' );
Once you re-load the console you’ll once again have some new menu items. This time they appear under the Super Admin (Network Admin in 3.1 or higher) menu and they are Domain Mapping and Domains. The Domain Mapping has some settings that don’t actually need to be changed. The Domains page is where we’ll map SLDs to a site (in the next step).
Step 4 : Create a Second Site
At this point your server is fully ready to support SLD sites, you just need to know how to add them. The basic concept is that you create a site first using WordPress’s normal functionality. Then you using the domain mapping plugin to map the SLD to the new site based on it’s Id. Because WordPress doesn’t yet natively support SLDs, you have to do a little fudging with the forms.
First, under Super Admin (or Network Admin) go to the Sites page. It is slightly confusing because you have to choose a sub-domain for your site, even though we’re going to use a SLD. That’s ok, just enter whatever you want as the sub-domain and add the site.
Now that you’ve added the site, you can click “Edit” under the new site and this will bring up a long page with lots of settings. Don’t worry about changing everything right now but you do want to change these two fields: Domain and Fileupload URL. These need to be changed to your new SLD:


![]()
At some point once WordPress natively supports SLDs you would probably be done at this point. In fact you will be able to visit your new site if your domain is already configured, but you won’t be able to log into the admin panel for the site. So we need to map the domain over to the new site.
Before you leave the Sites page, make a note of the ID of your new site. (In the screenshot above, my site “whatever” has the ID of “8″). If it’s a new install, then your ID will probably be “2″.
 Head to the Super Admin -> Domains page (in 3.1 this is Network Admin -> Settings -> Domains) and there is a form at the bottom to add a new Domain. Leave the Primary checkbox checked. Enter your site ID from above and the domain. Click Save to add the mapping.
At this point you’re done and you should be able visit your site using your SLD as well as login to the admin panel. I hope this tutorial worked for you and helped you to understand how WordPress MU feature works as well as some of it’s current shortcomings.
Please leave a comment if you have any suggestions to make this walk-through easier.
Video Tutorial for Activating Multi-Site
This video screencast is a quick tutorial for how to set up WordPress 3.0 in multisite mode. The WordPress codex has written instructions if you want to use those as well.
Don’t forget to Subscribe to Email Newsletter, Follow us on Twitter and Like us on Facebook – for recent updates.
